A PST file is a comprehensive backup of all your data stored in Outlook. If you want to switch from Outlook to Gmail, importing a PST file is the best way to transfer the most data with minimal work. You can import PST files into Gmail with a Gmail Workspace account or use a workaround to sync your data.
We show you how to import a PST file into Gmail for personal and business accounts. If you’re considering switching to Google Workspace for your business, importing PST files is the best solution for your team members. This is handy if you use the most powerful Chromebooks, as Gmail offers more features in ChromeOS than Outlook.
What is a PST file?
An Outlook Data File (.pst) file is a copy of the information in your Outlook account (including, but not limited to, emails, contacts, and appointments) stored on your local device. This file is a backup of your data and lets you access your emails, calendar appointments, contacts, and tasks without an internet connection.
Gmail offers a dedicated import tool for mail and contacts, but it cannot import the other data included in a PST file, like calendar appointments.
Outlook for Microsoft 365 uses Offline Outlook Data Files (.ost) to store data offline. Switch to the desktop Outlook client to export PST files.
Should you import Outlook data into Gmail with a PST file?
Don’t transfer your data with a PST file if you aren’t importing Outlook data into a Google Workspace account or only use Outlook for its email features. Instead, use Gmail’s import tool to transfer your emails and contacts, then manually move extra data.
Related
How to transfer emails from one Gmail account to another
Effortlessly transfer emails between Gmail accounts with POP downloads and the forward feature
How to export a PST file from Outlook
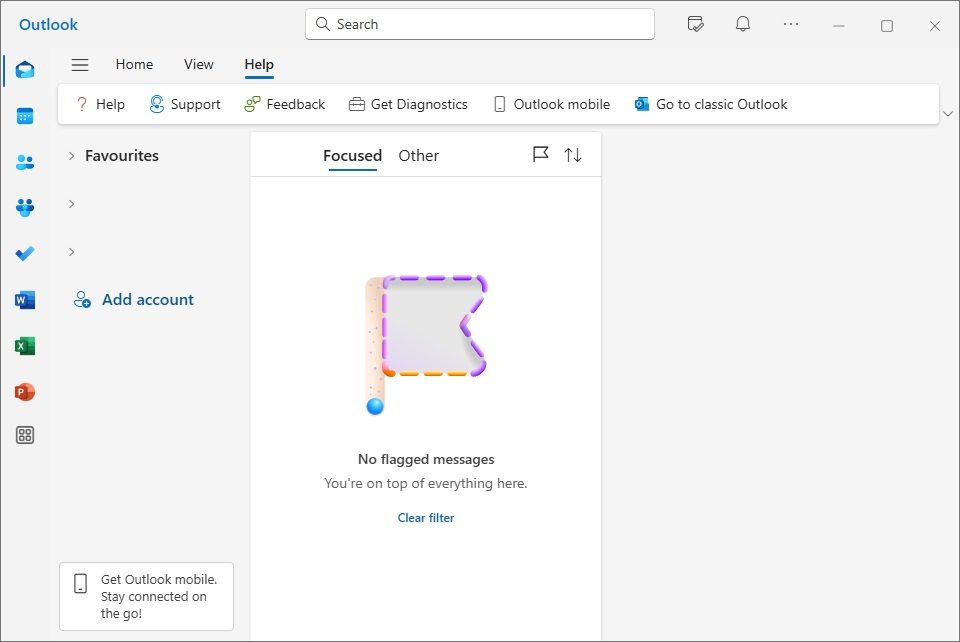
Before you touch Gmail, manually export your PST file to ensure you import up-to-date data. You can only export a PST file with Classic Outlook. If you use New Outlook, switch to Classic Outlook by clicking the Help button in the toolbar and selecting Go to classic Outlook.
If you’re unsure if you’re using Classic or New Outlook, check the upper-right corner of the app. Classic Outlook shows a switch labeled “Try the new Outlook.”
During the PST export process, Outlook asks if you want to set a password for your PST file. Skip this step. It can cause problems.
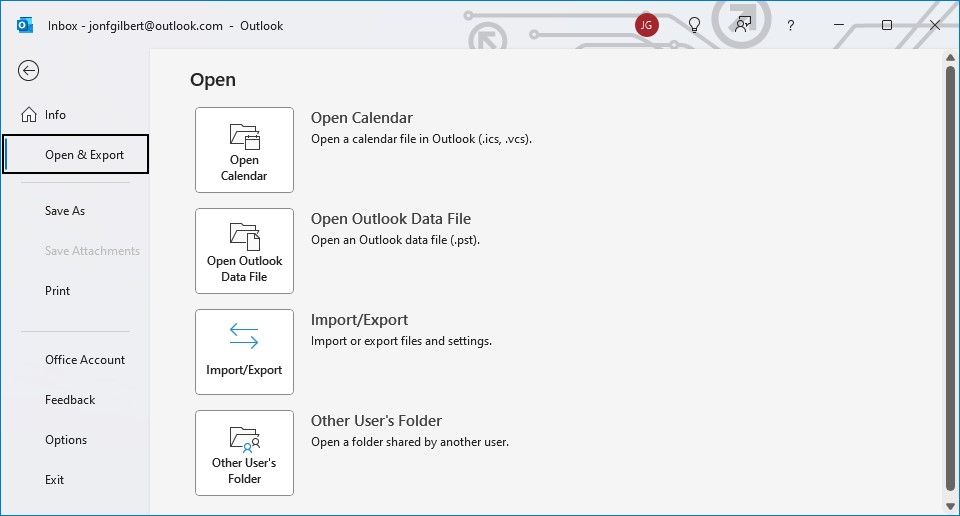
- Click File in the upper-left corner of the app.
- Click Open & Export in the sidebar.
-
Click Import/Export.
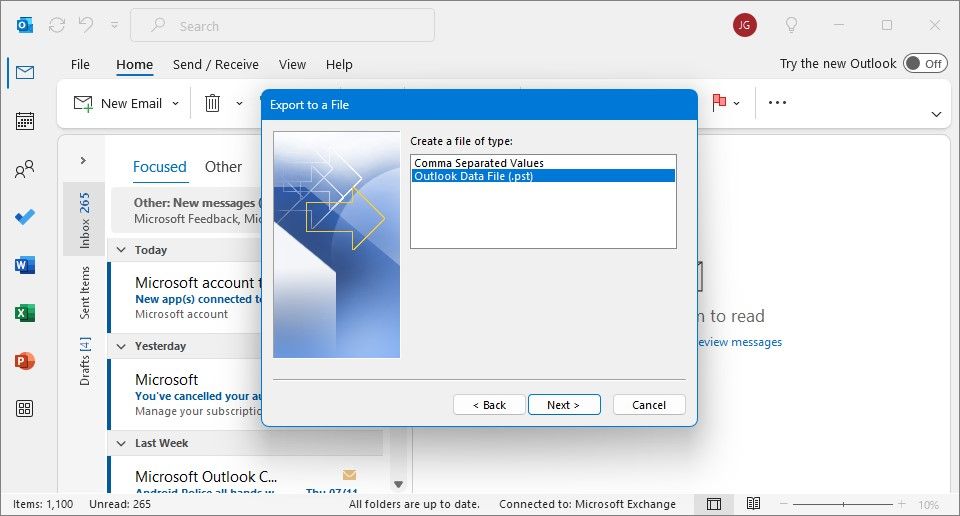
- Select Export to a file from the pop-up window and click Next.
-
Select Outlook Data File (.pst) and click Next.
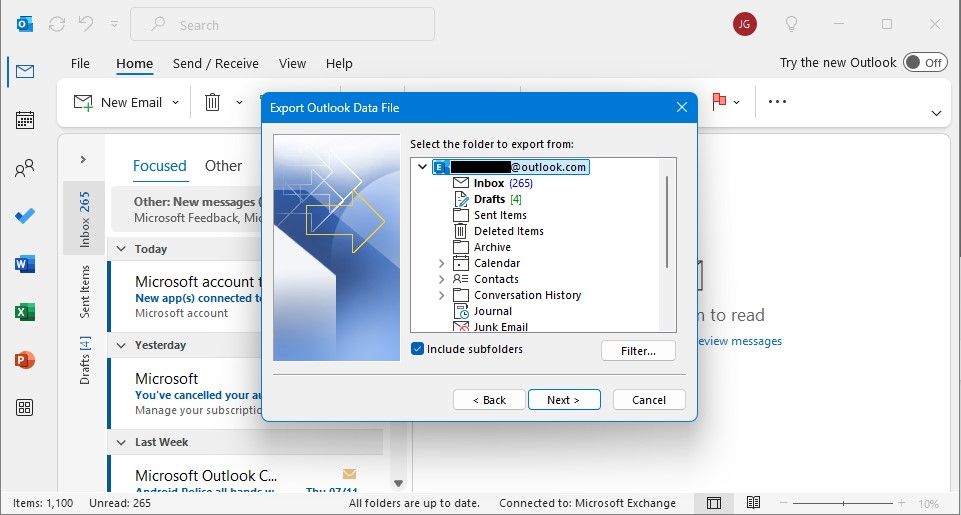
- Choose the email address you want to export, select the Include subfolders checkbox, and click Next.
-
Click Next to export your PST file.
Your PST file is saved in C:Users<username>DocumentsOutlook Files by default.
How to import a PST file into Gmail with Outlook
While Gmail doesn’t have a dedicated tool for importing PST files into personal accounts, you can perform a nifty workaround to sync the data from a PST file with Gmail. Before you start, export your PST file using the steps above.
When you add a Gmail account to Outlook, the Outlook and Gmail clients sync, and you can check your emails from both clients. This functionality means you can import a PST file into your Gmail account on the Outlook client, which then syncs the data with the Gmail client.
However, this method creates unnecessary folders in your Gmail client. If you struggle to find imported emails, use Gmail’s search function to track them down.
You must use Classic Outlook for this method.
Add your Gmail account to Outlook
The first thing you’ll do is add your Gmail account to Outlook.
- Click File in the upper-left corner of the app.
- Click Add Account under the Account Information heading.
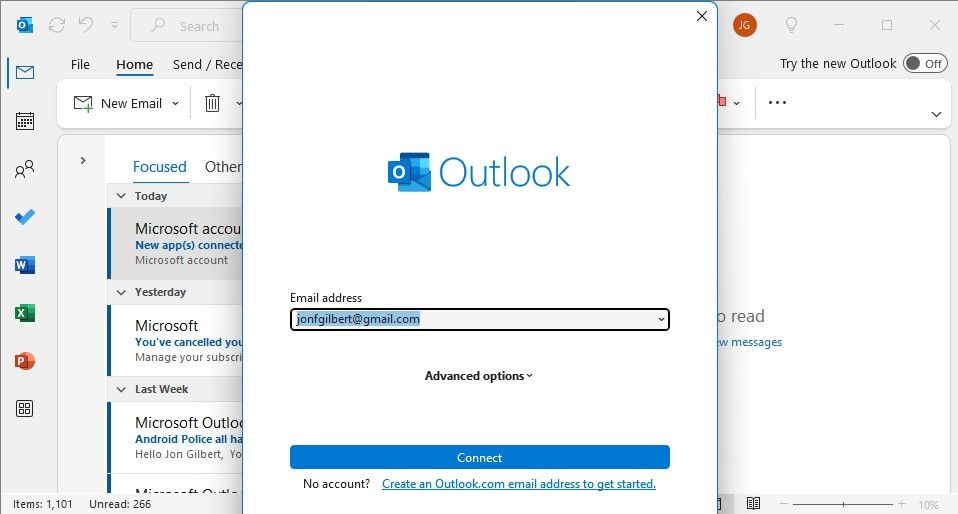
- Enter your Gmail account.
-
Click Connect.
Import your PST file into your Gmail account on Outlook
Before importing a PST file, check if your Gmail account synced with the Outlook client. If there are errors, resolve these before continuing.
- Click File in the upper-left corner of the app.
- Click Open & Export in the sidebar.
-
Click Import/Export.
- Select Import from another program or file from the pop-up window and click Next.
-
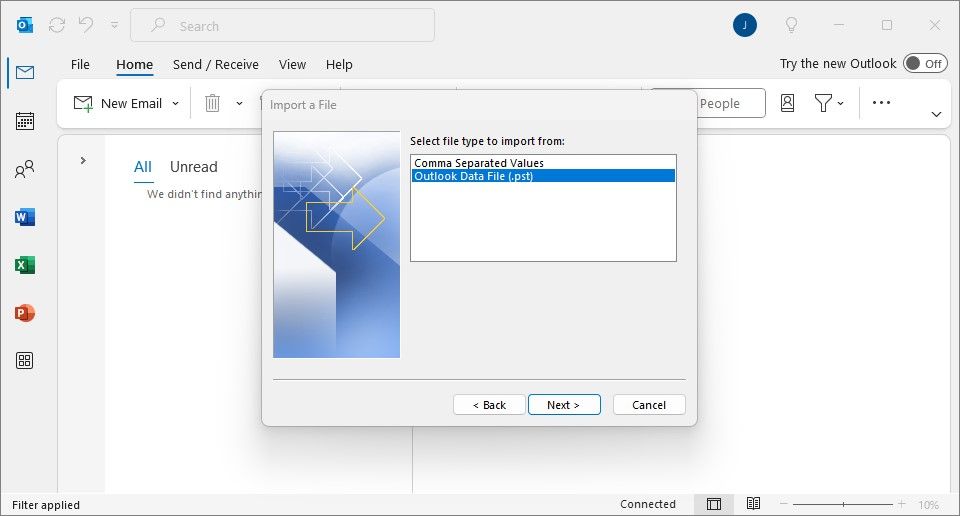
Select Outlook Data File (.pst) and click Next.
- Browse to the PST file you exported earlier and click Next.
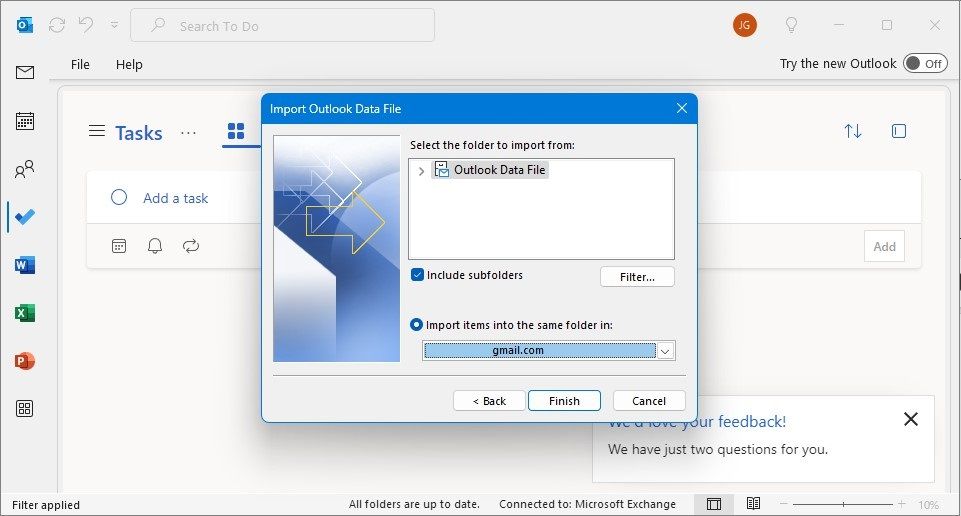
- Select the Import items into the same folder in radio button.
- Select your Gmail account from the drop-down menu.
-
Click Finish.
Outlook may take a few minutes to sync with your Gmail account. When it’s done (click the green circling arrows in the upper-left corner of the Outlook client to check on the process), the data in your PST file is accessible from the Gmail web client or mobile app.
How to import a PST file into Gmail with Google Workspace
Google offers a dedicated tool for importing PST files, but it’s only available for Google Workspace admins. This tool is called Google Workspace Migration for Microsoft Exchange (GWMME). You can install it from the GWMME download page.
This method is best used to import multiple PST files at once. Use a third-party tool to import a single PST file into Gmail.
After installing GWMME, authorize it for your Google Workspace account. You only need to do this once for your admin account, not for each Gmail account you import PST files into.
Follow the instructions in the GWMMEE tool to import your PST file. You must have the following information to import PST files:
- The location of your PST files
- Your Google Workspace domain name
- The JSON credentials file (created during the authorization process)
- The email address of your Google Workspace super administrator
Don’t lose your Outlook data
Importing a PST file into Gmail is a complicated process, but it is the most comprehensive way to transfer your Outlook data to Gmail. However, Gmail and Outlook do not offer the same features, so you cannot import some data (such as tasks created in the To-Do app in Outlook) from a PST file. If you don’t mind keeping your Outlook account active, you can check your Outlook emails in Gmail without exporting and importing PST files.



GIPHY App Key not set. Please check settings